Monday, March 14, 2011

Day 73: Egg Carton Jewelery Divider and CROCHET

Here is the inside shot of my egg carton jewelery divider....you can see that the posts in the middle are tall for rings (that is why I buy the "fancy" eggs.....JK....I open them, see that none are broken, and if it happens to have tall ring-worthy dividers, then so much better!).  I painted the inside black (the picture of the outside was on yesterday's post) and I even threw some stray beads in the bottom of each egg spot and covered with diamond glaze.  It isn't really a design element.  I just like the little unexpected surprise.  It adds a little strength to the bottom of what is really just thick paper.

This is what took FOREVER to dry.....and the photo makes it look foggy, but really it is clear with a pile of spilled and unsorted beads from past projects.  A little bit of color.  I would probably put brighter colors in if I had choices next time.


If I were to stack the necklaces on top, I could wrap the whole carton with a ribbon and take it with me on travels.  My daughter might need one of these for here "dress up" stuff so that she could take it with her on sleep overs.  I remember some intense evenings of dress up at my friend Tristan's house.  Mostly that involved the plastic eggs that used to have panty hose in them.....another story for another day.


I have been working with a loverly ball of yarn today to make a thin scarf just for show and not really for warmth.  I have some length to add for sure, but I love the pattern.  I revised it from a blanket I made years ago....but with thin beautiful yarn and a tiny needle, it is really quite delicate.  Pretty pretty crochet!
I may have to add some beads too.....I may not be able to resist.  The yarn is so pretty all by itself though!

Sunday, March 13, 2011

Day 72: frou frou fun all around

I used my lyno leaf stamp and some paint to make a nice little gift bag out of the 101 paper grocery bags that I have hanging around.  I double bagged and I turned the outside bag inside out so that the print wouldn't show....but in retrospect, if I had thought about the fact that I covered it nearly head to toe in black paint, then maybe the exercise in patience that is reversing a paper bag could have been avoided.  I stamped over the black with silver and then wrote words with a silver sharpie.  With some tissue paper in it (knowing me, I would hunt out some red stuff), I think it would be quite nice and funky.  This bag is modeled today by my dog Verbaux (google Verbaux if you want to know HOW ON EARTH my hubby managed to name our dog).  AND she didn't even eat the bow just to prove what a good dog she is (small snapshots in time, she is truly the model pup citizen).


Pink beaded necklace and frou frou hair thingy out of leftover ribbon for my pink eight-year-old princess.  Very quick, and she is all ready to wear all pink to school tomorrow.


Here is the outside of my next egg carton remodel.....Again with the silver paint and the lyno stamps as well as lettering and detailing with the silver sharpie.....the inside is STILL not dry.....maybe tomorrow the public will get a picture of the interior.  I know know exactly which eggs to buy to come up with the ultimate egg carton.....Archer Farms from Target....or the free range eggs that Rainbow has in the organic section......what I look for is the complete top (no holes please).....so that I can decorate it easily!  There is also an inside consideration as well, which I will share with photo tomorrow.

Saturday, March 12, 2011

Day 71: Necklace

I made one long braid and looped it around so that it would close in front.  I attached some size 6 pearl beads and some silver swirls that I made on the dangly end.  I love this ribbon.  I think it is my favorite ribbon that I have used so far.  I just wish I could get a better picture.....I also did two other projects today but they aren't DRY yet and so I will have to wait to reveal them later.  I figured by now the viewing public has had enough braiding even if I haven't =)

Friday, March 11, 2011

Day 70: Egg Cartons, Candy Wrappers, and Ribbon Scraps

Okay, after last weekend's massive egg bake, I found that I had a few empty egg cartons on hand....I have a few ideas (and I have to admit that this one is not very good....but it is my first one, and I have the beginnings of a migraine).  This one will hold all of the little scraps of ribbon I have on hand right now....not a small stash and seemingly growing every day until I decide what I am going to do with them....hmmmm.  My hubby also brought home a package of candy wrappers today, so decoration was as easy as 1,2,3, GLUE!

Thursday, March 10, 2011

Day 69: More Kumihimo

Felix started his first braid today and took to it quickly.  He is good with patterns even if not always the most patient with new things.  He got several inches done in a short time and begged to do it in bed after bed time.....no, no, you must sleep young one!  You can braid again tomorrow for sure!


I added a sterling end caps and a sterling magnet clasp to finish off my pearl seed bead monster cord from yesterday......I LOVE IT!  I will resist the urge to wear it to bed.


I am still smiling at the end of a long day....but barely.  I will do virtually nothing tomorrow....I can just FEEL it!  Okay, maybe I will finish of my other ideas for sure, and then rest.  I made a 30+ inch braid out of very thin yarn today, and I plan to have several loops together for a bracelet.  I will likely add other strands of beads to the cluster cuff too.  I just like the gold/silver/brass look of the string so will likely try to bring that out in any findings I add to it.  Check it out!  I love YARN!

yes, it took forever

Wednesday, March 9, 2011

Day 68: Kumihimo Braid


Disk with orientation to get the beaded helix design
 I completed another variation using the Kumihimo disk.  I used doubled up black ribbon with pearlized seed beads (size 6) and I also used extra strands (4 beaded + 12 ribbon = 16 total) to make a heavy cord (like the rust colored yarn one from yesterday).  I took a picture of the orientation on the disk so I could remember how to get the continuous beaded helix running around the black cord.  I have to work out the finishing for this one also as it is quite thick.....I really like it though!  Chunky is IN!


Necklaces average 16 in. for the braid, longer with finishing
completed variation: black ribbon and pearl seed beads

Tuesday, March 8, 2011

Day 67: Braided Cords with BEADS!


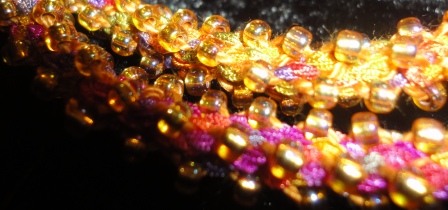
My mom is here all week, and this is what we worked on today using the Japanese foam wheely thing (Kumihimo Braiding Disk...strange...it says made in China on the packaging).  We used packaged ribbon, seed beads (size 8) and thread for stringing the beads.  There are seemingly infinite variations and patterns that can be made using just the ribbon or yarn or string and then adding beads is a whole new thing.  I worked on ending these ends with caps and wire, but I am not convinced yet that this is THE WAY that I need to be doing it.  This one worked and is finished off in a neat and tidy way although I didn't add a clasp when making the rings....silly me.

This picture shows a little closer detail, but alas I seem to find the limitation in my camera showing these details without getting washed out in the flash.


This is my mom's project with solid beads and thread (no visible thread and no ribbon....very pretty, but LOTS OF BEADS and patience) but I thought the whole set-up with the rubber bobbins is pretty ingenious!


Below is my last picture for today....it is using leftover yarn from my sweater project yesterday.  I used another orange/copper looking ribbon fiber with it, but you can't see it at all in the braid as the yarn just sort of fluffs over the accented fiber.  I don't know quite yet what to do with this one as it is very thick and not quite long enough for neck use, but I learned a lot with it.  I will likely try a reverse one tomorrow with predominately ribbon fiber and just a couple of the yarn sections.  Still, pretty interesting work for a day!